Rolling (and Yawing and Pitching) the Bones, Part 1
December 28, 2001
by Darrel Plant
Since I started working with Shockwave3D in Director 8.5, one of my main -- ahem -- bones of contention has been that one of its most important features has been unavailable to the larger developer community. Namely, since bones are one of the few Shockwave3D elements that can't be created by Lingo, unless you had one of the few 3D applications that could export W3D files with bones, there was no way to take advantage of the tremendous benefits bones offer for 3D animation. In the weeks leading up to the end of 2001, that changed.
Animation in a Shockwave3D scene can be done in several ways.
The first method is the transformation of models. This is the simplest, and can be accomplished through the use of Lingo or in keyframe animations. Models can move, rotate, and scale through their transform property. This type of rigid body animation is enhanced by the Havok physics engine, which controls movement and rotation based on relative model positions at any particular moment and a set of physical simulation rules.
To change a model's shape, the meshdeform modifier can be used to modify the positions of individual vertices in a mesh. This is not only time-consuming -- requiring the generation of a new mesh for each animation step -- but it can be complex if textures must be remapped to a changing shape or shapes. It's also data/computation-intensive, because new position values must be provided or algorithmically derived for each step.
Then there's bone animation. Bone animation uses transformations of an underlying structure -- a skeleton -- to affect the mesh of a model. Instead of keeping track of where each vertex of every mesh in the model is at a key frame in the animation, you just need to know where a particular bone is in relation to its parent bone (if any), and which vertices are attached to the bone. As the bone rotates or moves, its vertices maintain their relative positions to the bone's joint, and so do any subordinate bones in the skeleton (leg bone's connected to the hip bone...).
Bone animation in Director can also be done in a couple of ways. Most of the bone-capable Shockwave3D exporters can export motions, a time-sequenced series of transformations to the skeletons in a 3D scene. Bone transformations can also be directly modified using Lingo.
The type of skeleton employed in Shockwave3D models is relatively simple. A vertex gets its position and orientation from the bone it's attached to (there's none of the muscle-bulging that many 3D modeling tools can provide in their own rendering systems). Bones are the most efficient animation control method in Shockwave3D, but the options for creating them have been limited.
Initially, only Discreet Studio3D Max could export Shockwave3D models with bones and bone animations. Other applications like Caligari trueSpace and Maxon Cinema4D can create bones but can't (as of this writing) export them to the W3D format -- although they can export keyframe animations. Softimage Maya's exporter reportedly exports bones, as does that of Newtek Lightwave 3D. Maya, Max, and Lightwave are aimed at professional 3D artists, range in price from US$2,500 on up, and probably weren't under your Christmas tree this year, so it may have been a little difficult to experiment with bones in Shockwave3D.
ShapeShifter to the Rescue
Tabuleiro's ShapeShifter3D 1.5 gets you half the way there, though. While it can't export bone animations, the latest version can export the bones and their vertex associations. At less than US$100 (promotional pricing at the time of this writing was actually US$79.95), it's easily within the reach of someone interested in learning more about Lingo-controlled 3D animation. If the bones are there, they can be animated!
This article will guide you through the creation of a simple model in ShapeShifter3D (you can download a trial version from Tabuleiro's Web site and follow along), and its animation through Lingo-controlled bone manipulation (see the sample here -- Shockwave 8.5 is required, natch). If you don't already have SS3D (or the current version), get it now. I'll wait.
[Editor's Note: Tabuleiro has invested some serious time in creating several digital video files that show common techniques, including skeleton creation, in theTutorials & Samples section of their site which should be understandable to anyone regardless of their native language.]
If you've ever taken a class based on the Macromedia-authorized Director training program, you may have run across a project based on a robot arm from the old CD-ROM game Iron Helix. It was always one of my favorites when I was teaching, although I always changed the project significantly. For this article, I'm going to do it again. Today, we'll make a 3D robot arm.
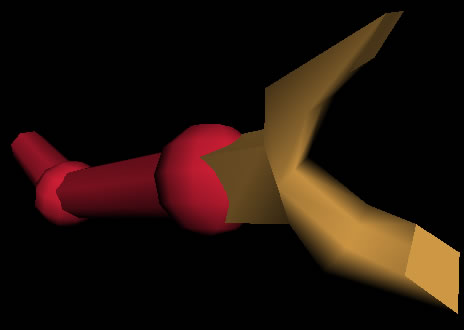
Mr. Claw
ShapeShifter3D runs as an Xtra in Director 8.5, just select it from the Xtras menu and the SS3D window will open. We'll start by creating the claw of the arm. Select the Create Box mode icon in the Create palette at the lower left of the window and draw a box in the Front viewport. The Box tool draws the box from corner to corner, so place the tool at the position of the upper-left corner of where you want the box, and click-drag to where you want the lower-right corner. Try to center the box on the origin.
After you've drawn the box, go to the Tools palette and choose the Select faces mode, which will allow you to choose individual faces in the mesh you've just created. Select the Ignore backfaces option to choose only the faces nearest to your viewpoint.

Click outside the box object to deselect it, then select the two triangles that make up the front face of the box by clicking on them in the Front viewport. Click to select the first, then Shift-click to add the other face to the selection. You can check the Top and Left viewports to make sure that only the front faces are selected.
At the right of the SS3D window, choose the Face tab, and use the Subdivide 4 button to make 4 faces from each existing triangular face. Deselect the faces by clicking away from the box.
Select one of the top 4 faces on the front of the box in the Front viewport, then Shift-click to select the other 3. Lock the Left viewport in pan mode by selecting its Pan button, click and drag to move the box to the left edge of the viewport, then unlock the pan mode.
In the Create palette, choose the Extrude mode. Click and drag the cursor right and up in the Left viewport to extrude the top half of the front of the box. Release the mouse button.

Without deselecting the faces, click and drag in the Left viewport to extrude the tip of the upper claw. Drag to the right and down slightly.
Choose the Rotate tool from the Tools palette, then click and drag in the Left viewport to rotate the selected faces so that they're parallel to the horizontal axis.
With the Select faces tool, choose the lower 4 faces of the front in the Front viewport.
Extrude the faces twice to mirror the extrusion of the upper portion of the claw, then rotate the second extrusion to finish the claw shape.
Lock the zoom mode of the Left viewport by selecting its Zoom button. Zoom out by clicking and dragging in the viewport, then pan the claw to the right side of the viewport.
Choose the Create sphere mode in the Create palette, then move the cursor to a point in the Left viewport where you want the center of the wrist sphere. The Sphere tool draws from the center out, unlike the Box tool. Make a sphere large enough to mesh smoothly with the base of the claw.
Choose the Create cylinder mode in the Create palette, and change the options at the bottom of the palette to 3 Stacks and 8 Slices. These options control the quality of the mesh making up the cylinder; decreasing these settings helps keep the total number of faces below the 500-face save limit of the demo version of SS3D. Since we won't be bending the cylinders, lowering the quality won't affect things much. Draw a cylinder in the Left viewport (from corner to corner, as with the Box tool), and keep an eye on the other viewports to make it about as wide as the claw.

Choose the Rotate tool, and do a numeric rotation on the cylinder by entering 90 for the X rotation and pressing the Rotate button at the bottom of the Tools palette.
Choose the Scale tool, and lengthen the cylinder by entering 1 in the X and Y fields, and 2 or more for the Z field, them pressing the Scale button (don't forget to change the default scaling for X and Y!) Use the Move tool to position the cylinder; select the tool, then click and drag in a viewport to move the selection.
Switch to the Groups tab at the right of the SS3D window. You should see 3 groups, a box, a sphere, and a cylinder. You can select groups by clicking on them in the Groups tab list, or by using the Select groups tool in the Tool palette. Use the Shift-click method to select more than one group in either case.
Select both the sphere and the cylinder (not the box) and press the Regroup Selection button in the Groups tab. This combines the two objects into a single group, with a name beginning Regroup in the Groups list. Press the Rename button and change the name of the regrouped cylinder and sphere to forearm. Select the box and change its name to claw.
Switch to the SS3D Edit menu and select the forearm group. From the Edit menu, select version 1.5's new (yeah!) Duplicate Selection command. An exact copy of the selection is created as a new group with a name beginning with the word Duplicate.
Move the duplicated group so that its sphere is about where the elbow of the arm would be. Rename the new group as arm.
In my model (robotarm.ss3d in the sample files), there are a couple of materials created and applied to the claw, forearm, and arm groups. Creating and applying simple materials in SS3D is a lot like color picking in other applications and it really doesn't have anything to do with bones, so I'll let you figure that one out yourself.
Next week we'll add the bones and import the completed model into Director. If you want to see the finished file, you can check it out here. If you'd like to get a jump on next week, download the ShapeShifter3D model and Director source file in Mac or Windows archive formats.
Copyright 1997-2024, Director Online. Article content copyright by respective authors.