Bowling with Havok, Part 2
July 29, 2002
by Darrel Plant
The Last Pieces
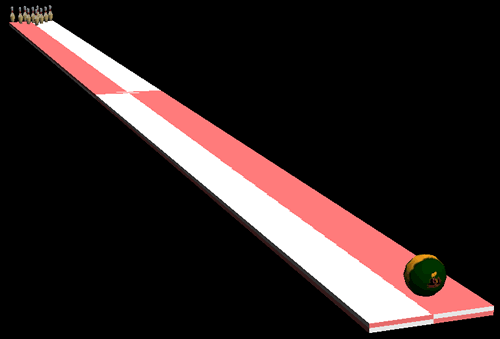
In Part I of this series, I started to show how I built a demo bowling game using Shockwave 3D and the Havok physics Xtra. In that installment, I used ShapeShifter 3D to create the ball and pin (with textures); then created some lights, positioned the camera, and defined the lane surface which the ball will roll along in Lingo. With those things in place, we're ready to add the ball and pins.
Adding the Ball
As the movie starts, the ball model isn't included in the alley cast member used as sprite 1. It needs to be imported into the 3D scene and positioned at the end of the lane. This is the handler used in the Create World behavior to do that:
on mAddBall me
preload member "ball"
pScene.cloneModelFromCastmember ("ball", "ball", member ("ball"))
m = pScene.model ("ball")
m.transform.position = vector (0, 12, 390)
m.transform.scale = vector (0.26, 0.26, 0.26)
m.addModifier (#meshdeform)
end
The preload command endures that the cast member containing the ball model is loaded into memory. It's not used as a sprite, and the movie will usually generate an error if this step isn't performed.
The model is copied from the ball cast member using the cloneModelFromCastmember method, and given the name ball. This step will also copy the shader and texture used for the model.
In addition to positioning the ball, the model's transform property is altered to match it to the scale of the lane. Using the 3DPI Xtra, I could see that the radius of the model's boundingSphere was 25.0 units. Scaling the model to 0.26 in all dimensions, the final sphere is about 13 units in diameter.
The meshDeform modifier is added to the model to enable it to be used with Havok.
The mAddBall method is executed in the Create World behavior's beginSprite handler with a single line added at the end:
me.mAddBall ()
Adding the Pins
I only needed to model one pin rather than 10. The first part of the handler that sets up the pins looks much the same as the one for adding the ball:
on mSetPins me
preload member "pin"
pScene.cloneModelFromCastmember ("pin1", "pin", member ("pin"))
m = pScene.model ("pin1")
m.addModifier (#meshdeform)
The handler then uses the resource imported with the model, clones it nine times, and positions each pin.
mr = m.resource
rowdepth = 12 * sin (pi / 3)
vert = 9
m.transform.position = vector (0, vert, -360)
repeat with i = 2 to 10
case i of
2, 3:
ioff = i - 2
xoff = -6 + 12 * ioff
zoff = -360 - rowdepth
4, 5, 6:
ioff = i - 4
xoff = -12 + 12 * ioff
zoff = -360 - rowdepth * 2
7, 8, 9, 10:
ioff = i - 7
xoff = -18 + 12 * ioff
zoff = -360 - rowdepth * 3
end case
m = pScene.model ("pin1").clone ("pin" & i)
m = pScene.newModel ("pin" & i, mr)
m.transform.position = vector (xoff , vert, zoff)
m.addModifier (#meshdeform)
end repeat
end
A call to the mSetPins method is added to the beginSprite handler, right under mAddBall. By this point, all of the pieces are in place: an alley, a ball, and 10 pins. Now it's time to make things move.

Creating Havok
To enable the Havok physics engine, two elements need to be added: A Havok cast member and one of the Havok initialization scripts.
To add the Havok cast member, just use the Insert > Media Element > Havok Physics Scene menu item. I've named the cast member physics.
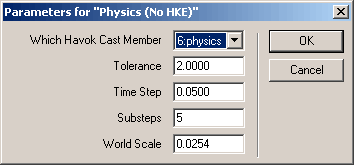
For the initialization script, I used the Physics (No HKE) behavior from Havok's behavior library. This script is the one to use when you're working with models that haven't been assigned physical properties in a 3D modeling tool such as discreet's 3D Studio Max.
To use the behavior, just drag it onto the Shockwave 3D sprite on the Stage or in the Score.

Above are the settings I found worked best for me. The Tolerance is much higher than default setting, but it seemed to be necessary for the bowling sim. Tolerance controls the accuracy with which collisions are evaluated.
The Havok (No HKE) behavior needs to be moved ahead of the Create World behavior in the execution sequence. The initialization of the physics engine needs to happen before any models are added to the engine. Just go into the Behavior Inspector and use the shuffle key to change the sequence.

Adding Models to Havok
The script to add the 12 models (lane, ball, and 10 pins) to the physics simulation engine is laughable easy:
on mSetPhysics me
hk = member ("physics")
hk.makeFixedRigidBody ("lane", true, #box)
repeat with i = 1 to 10
hk.makeMovableRigidBody("pin" & i, 1.65, true, #box)
end repeat
ballweight = 7.25
b = hk.makeMovableRigidBody ("ball", ballweight, true, #sphere)
end
The lane, of course is set up as a fixed rigid body, it won't move. Each of the pins is treated as a box. Collisions between them and the ball will not be entirely accurate, but much faster than if they were to be evaluated for their more complex, concave shape. The ball itself, of course, is just a sphere. The true in each rigid body assignment indicates that the object is convex. Weights are assigned to the pins and ball.
The call to the mSetPhysics method is added to the beginSprite handler of the Create World behavior after the ball and pin setups.
If you run the move at this point, you'll see the ball drop slightly to the surface of the lane.
Just Bowl, He Said
You're probably wondering when we're going to get around to actually bowling the ball. With all this setup, it's probably a long, torturous script and hours of typing before we get to that point, right?
Not at all. Just add this handler to the Create World behavior.
on mouseUp me
b = member ("physics").rigidBody ("ball")
ballweight = b.mass
b.angularMomentum = vector (0, 0, -0.12 + random (12) / 100.0 + random (12) / 100.0) * ballweight
b.linearMomentum = vector (0, 0, -430 + random (56) + random (56)) * ballweight
end
There are just two lines of code here that may see a bit obscure. By changing the z-axis angular momentum of the ball, I'm changing the amount of spin it has (note that the object we're affecting is not the model in the Shockwave 3D world, but the rigid body in the physics engine simulation). The numbers I chose weren't pre-calculated, but were derived from some experimentation with values that would potentially get me a track to either gutter, depending on the value of the random numbers.
The linear momentum is what moves the ball down the lane. Again, the values I entered are based on experiments.
Both values are multiplied by the mass of the ball, in order to allow scaling for heavier or lighter balls.
The linear and angular momentum are essential to the realistic look of the ball roll. If you comment out the linear momentum, of course, the ball will simply roll to one side or the other of the lane. Without the angular momentum, it will just go straight down the middle of the lane. The combination of momentum and friction with the alley can give a very wide variety of tracks to the ball. There's no way to control the ball in this version -- it just goes when you click the mouse button -- but there are an endless number of ways to associate the variables for angular and linear momentum with mouse movements or keys.
You've Got Balls (and Pins)
So far, you can only bowl once, but we want to be able to roll the ball as many times as we like, and reset the pins (just like in the original demo). Not a problem.
When the ball disappears off the end of the lane, it's not gone from the world. The ball (and any pins it took with it) are falling into the endless void of the Havok physics world. To bring it back, just add a line (shown in bold) to the mouseUp handler before the momentums are applied:
ballweight = b.mass
b.position = vector (0, 12, 390)
This resets the ball to a position at the end of the lane every time the mouse is clicked.
I chose to reset the pins if the mouse was clicked with the shift key down, by adding this as the first line of the mouseUp handler:
if the shiftDown then me.mResetPins ()
The mResetPins method itself incorporates pieces of the mSetPins and mSetPhysics methods:
on mResetPins me
repeat with i = 1 to 10
member ("physics").deleteRigidBody ("pin" & i)
end repeat
rowdepth = 12 * sin (pi / 3)
vert = 9
repeat with i = 1 to 10
case i of
1:
xoff = 0
zoff = -360
2, 3:
ioff = i - 2
xoff = -6 + 12 * ioff
zoff = -360 - rowdepth
4, 5, 6:
ioff = i - 4
xoff = -12 + 12 * ioff
zoff = -360 - rowdepth * 2
7, 8, 9, 10:
ioff = i - 7
xoff = -18 + 12 * ioff
zoff = -360 - rowdepth * 3
end case
pScene.model ("pin" & i).transform.position = vector (xoff, vert, zoff)
end repeat
repeat with i = 1 to 10
pScene.model ("pin" & i).transform.rotation = vector (0, 0, 0)
end repeat
repeat with i = 1 to 10
member ("physics").makeMovableRigidBody("pin" & i, 1.65, true, #box)
end repeat
end
Unlike the ball, the pins can't just be moved to a position. If the ball's tumbling, who'd notice? It just looks wacky with the pins. I chose to remove them from the physics engine (deleteRigidBody), use the same routine to place them in their position at the end of the lane, reset the model's rotation transform, then add them back to the physics engine.
Moving in for the Closer
Now, you can bowl to your heart's content, but the action's a little far away, isn't it? The pins are so small. What's needed is some way to follow the ball with the camera.
There are any number of ways to accomplish this task. I opted for a third behavior applied to the Shockwave 3D sprite, named Follow Ball:
property pScene, b, c
on beginSprite me
pScene = sprite (me.spriteNum).member
b = pScene.model ("ball")
c = pScene.camera[1]
end beginSprite
on exitFrame me
if b.transform.position.y > 0 then
c.transform.position = vector (0, b.transform.position.y + 35, b.transform.position.z + 170)
end if
end
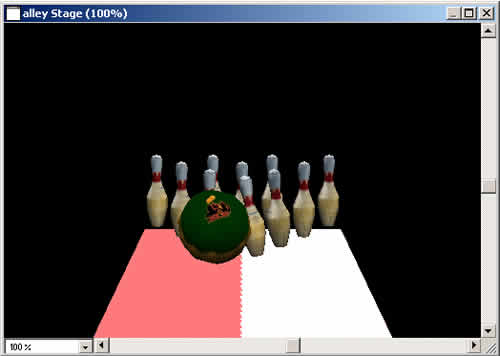
This behavior just tracks the position of the ball so long as the ball's y coordinate hasn't dropped below the level of the lane, moving along above and behind the ball as it goes down the lane. It usually gives you a pretty good close-up of the pins.
You can try your own positions for the camera, my own favorite is right behind the pins. Scary!
Bye-Bye Pins
One thing you'll notice is that if you knock some pins down and they don't fall off into the void, they're still lying on the lane on your next bowl. Somehow, we want to clear them.
Oddly enough, while the task of rolling the ball down the lane sounds hard but takes just a couple of lines (after setup), this task is a bit more complex than it sounds.
First off, I added four properties to the Create World behavior:
property pAction
property pLastPos
property pVelocity
property pRollTime
In the beginSprite handler, I initialized the pAction property (this is the last item to add to the handler):
pAction = #static
pAction will be used to keep track of the current state of the simulation.
Two lines are added at the end of the mouseUp handler:
pAction = #rolling
pLastPos = b.position
When the mouse is clicked and the ball is given its initial momentum, the pAction property is #rolling. pLastPos will help keep track of the velocity of the ball.
All of this comes together in a new handler added to the Create World behavior:
on exitFrame me
case pAction of
#rolling:
b = member ("physics").rigidBody ("ball")
vVector = pLastPos - b.position
pLastPos = b.position
if pLastPos.y < 0 or vVector.magnitude < 0.1 then
pAction = #pins
pRollTime = the milliseconds
end if
After the ball begins its path down the lane, the difference in position between its current and previous position is tracked by the pLastPos property. When the ball's position drops below the lane or the magnitude of its vector indicates that it's just sitting there on the lane, then the pAction property is set to #pins and the the pRollTime property is set.
#pins:
now = the milliseconds
elapsed = now - pRollTime
if elapsed > 2000 then
repeat with i = 1 to 10
rb = member ("physics").rigidbody ("pin" & i)
if not voidP (rb) then
if rb.position.y < 10 then
member ("physics").deleterigidbody ("pin" & i)
pScene.model ("pin" & i).transform.position.y = -100
pScene.model ("pin" & i).visibility = #none
end if
end if
end repeat
pAction = #static
end if
end case
end
The second half of the case statement in the exitFrame handler waits for two seconds after the ball either stops or drops off the lane, then goes through each of the pins in the physics engine. If the pin's y coordinate is less than 10, it's either fallen off the lane, or it's tipped off its vertical enough for me to consider it down. The pin is removed from the physics engine, moved to a position under the lane, and rendered invisible. The pAction is set back to #static. This is where you'd probably want to add a scoring mechanism.
This all requires a slight change to the mResetPins method. The initial repeat loop should now read:
repeat with i = 1 to 10
rb = member ("physics").rigidbody ("pin" & i)
if not voidP (rb) then
member ("physics").deleterigidbody ("pin" & i)
end if
pScene.model ("pin" & i).visibility = #front
end repeat
The previous version assumed that all of the pins remained in the physics engine. This checks to see if one exits before it tries to remove it.
And that's it! Obviously, it's not an entire game, it's a demo, and for a full-fledged, finished piece, you'd need more (and better) graphics, some models, cool sounds, and instructions (and a ball-control mechanism!) but if you've been putting off using Havok because you thought it looked way too hard, look again.
You can also see some fully-realized versions of 3D bowling at Raketspel's Shockplay.com and the Skunkworks Games version ("Gutterball") that appears on Shockwave.com.
You can download a Director 8.5 DIR of the result of this article as SIT or ZIP archives. The ShapeShifter and image files are available as a part of Part 1's downloads.
Meanwhile, let's bowl!
All colorized Lingo code samples have been processed by Dave Mennenoh's brilliant HTMLingo Xtra, available from his site at http://www.crackconspiracy.com/~davem/.
Copyright 1997-2026, Director Online. Article content copyright by respective authors.
